
Photo Updates & The Island
- Michelle Dittmer
- Apr 19, 2021
- 4 min read
This week we continued our focus on the island, assembling the drawer fronts. We are inching closer to completion every day and I could NOT be more excited!
I'm acutely aware of how little countertop space I have at the moment and having the island done will not only add the storage I need, but a usable workspace for me to flex my culinary skills that have been mostly dormant the last 6 or so months.
The drawer fronts required some McGuyver-ing of our tools in order to make them work for us. In particular, we needed a zero-clearance throat plate for the dado stack in the table saw to cut the rabbet around the inset piece in the middle of the drawer and a crosscut sled for the mortice and tenon.
Unless you're in the world of cabinetry construction or like to peruse YouTube DIY channels (if you do, we highly recommend Bourbon Moth), these words are likely foreign to you, as they were to me prior to this project.
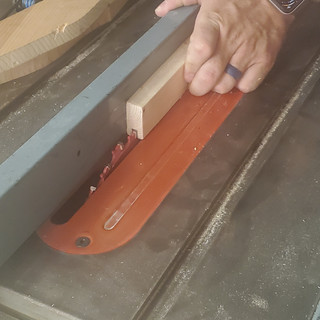
Last week Scott made the zero-clearance throat plate out of a piece of plexiglass that he cut to size, then used the heat gun to make it pliable so he could screw it down into the saw for smooth movement of the wood over it. Then he raised the blade, cutting into the throat plate. This will allow him to get wood right up next to the blade, without it slipping into the hole next to the blade.


The center of the drawers is made out of MDF and it slides into the mortice of the side pieces (more on that below). In order to make it fit together, a 1/2" rabbet (think of this like a ledge) was cut around the edges. In other words, the edges were half the width of the middle.


This week he made the cross-cut sled. This is to hold the side pieces of the drawer front so that he can cut the mortice and tenon. Below are some diagrams I made in Publisher (don't laugh, I couldn't figure out CAD in high-school, this is the best I can do! :) ).


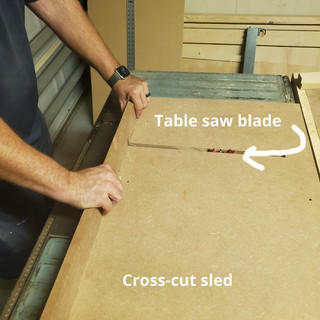


Each of the four pieces around the center have the mortice cut into them, which is just a groove down the middle. The two long pieces also have a tenon. This is a tiny little leg/peg/lip (whatever you'd like to call it), that fits snuggly into the mortice to hold the two pieces together (I made it dotted in the first diagram so you can see that it fits inside of the other piece). Cutting this without a crosscut sled would have been difficult, at best, but more likely, just plain dangerous trying to hold onto that small piece of wood and cut a precise amount off each end.
Scott got all of the drawers cut and assembled this weekend. We really have a good rhythm when working together, dividing the work and conquering the projects. My favorite part of building the island isn't the new terms (although, I do plan on peppering "mortice and tenon" into my answer to "what did you do this weekend?" throughout the week ;) ), it's actually the some of the things we've done to be more efficient. We have 12 drawers on the island, and we've used MANY tools to make them, as well as several different blades and setups on the table saw. Each tool swap or adjustment takes time, so we've really tried to think through how to efficiently take care of multiple cuts at once so we aren't going back and using a tool we already put away. This weekend we created a stop-block jig that allowed me to measure once, cut a test piece, and, if it was accurate, cut anywhere between 4 and 16 pieces to exactly the same size without pausing. It was AWESOME. It felt SO good to knock out 16 cuts in quite literally just a few moments. I realize to someone that does this kind of stuff for a living this is a no-brainer, and I'm also sure there are actual tools that do this. But we are DIYing it over here, which ofttimes means really just winging it, so this felt like a huge win for efficiency!


The other focus this week was getting full-room photos (as requested!). I'd be lying if I said I look at these photos and see completion or anything close. I actually look at them and see the remaining work to be done, the imperfections, and the parts that almost made us quit this crazy whole-house project. But I also see the hard work, the determination, and the learning moments that made up each project. I see the potential and, more importantly some days, the progress. It's still a mess, but it's OUR mess and I love that you all are along for the ride!


I hope it's easy to see which is the "before" and which is the "after", don't be fooled by our kitchen ceiling or the unpainted drywall, yes, those are some of the "afters" (more like "durings").


Enjoying taking this journey with you two. Thank you so much for taking the time to publish the weekly updates. Love you both and I am so impressed by all you have accomplished.