
The Island continued
- Michelle Dittmer
- Mar 28, 2021
- 4 min read
Work on our kitchen island (affectionately deemed the "Continent" by Scott's Aunt :)) continued this week.
We picked out the paint color for the island. We had originally chosen a Benjamin Moore color, but after a fiasco at our local Ace that sent my anxiety into a tizzy we did some more googling and found that Sherwin Williams' Emerald line has a urethane paint that's great for cabinets, so we picked a SW color: halcyon green.

It's a muted seafoam-type green that looks really calm to me. I painted a sample and love how in some lights it looks more green, in others more blue. Here are some photos I took, the last is against the green wall in our bedroom (secret moss by Valspar), all photos are natural light. Also, I cannot get enough of our floor 🤤.


Like with every project thus far, there are so many mini-steps that in between I have a tendency to change my mind. This is about the 17th color I've chosen for the cabinets, but the paint has been purchased, so it's officially the one!
In addition to getting the paint color chosen we cut the floor to accommodate the island. It took A LOT of measuring. You can watch the whole (almost 2 and a half our process) of measuring, taping off the floor, moving the island, and cutting the floor:
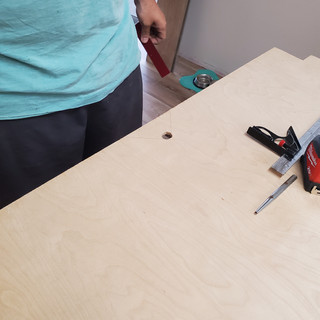
Once the floor was cut, we had to run the electrical from the box in the floor through the middle cabinet and out to the edges. It took two trips to the hardware store and a lot of patience and visualizing what we needed, and how to get there.
We started by drilling holes in the bottom sides of the middle cabinet but quickly realized that would mean we'd have to thread the wires through the hole, but we couldn't reach under it, so that wasn't going to work.


Scott whipped out his multitool and expanded the hole to create a little house shape that would allow us to just set the middle cabinet on top of the wires, it worked perfectly.


Once we dealt with the middle box, the sides were easier, we were able to just drill a hole in the bottom and thread the wires up through, again using the "house" shape to just set the cabinet on top of the wires.

We finished off Saturday night by tackling the small project of hanging curtains on the front picture window.


Scott's laser level came in super handy!
This morning we got started early with Scott finishing up the wiring on the island, including cutting the holes in the cabinet for the outlets to come through. He said that part was nerve wracking.


While Scott worked on the island I taped and painted the remainder of the trim in the livingroom, cleaned the bathroom, and vacuumed up the sawdust from his work.
By the time noon hit we were ready to work on the face frame for the island. We used Poplar, a semi-hard wood for these front pieces. It's more pricey than the pine or Whitewood we usually use, but is harder and will hold up better over time to the cabinet's doors and drawers shutting on it.


We started by cutting the two side pieces, then measured for the top and bottom and used pocketholes to put the rectangle together, marking where the dividers between the cabinets needed to go. Once we cut and secured the dividers we clamped the whole thing to the cabinet to be sure it lined up.
Once we were happy with it we cut two spacers to help ensure the dividers between the drawers were equal (we have two 10 1/4 in drawers and one 5 in drawer in each of the two large cabinets).


Once the whole thing was together we brought it inside and re-clamped it. Perfect fit! It's starting to look like a real cabinet!
We took a mid-afternoon break to jump in the pool (briefly for me, but Scott swam for a bit), have a drink, and relax. The pool creeped up to 79 today, the warmest it's been so far, so we had to take advantage of it.
After our break it was back to Lowe's for more Poplar and pockethole screws.
We repeated the same steps to create the frame for the second side, remembering to label the top and bottom (something we forgot last time).


This one went much smoother since we knew the process. I'm still the Queen of pocketholes, so I got to show off my skills while Scott measured and cut the boards.
Once it was done we carried it inside and clamped it in place.


We still need to sand and paint these frames, then we'll tack them in place, fill any holes, and touch up the paint, and the frames will be done!
We finished our work for the weekend with two more curtainrods in the livingroom behind the couch and finally hanging the sign my brother got us for Christmas on the lanai.


The windows behind the couch are super skinny windows (17"), too small for blinds that I could find, so they have the DIY roman shades I made, but I was really hoping the curtains on the outside would make them look larger. Toby approves!


With the work for the weekend done we headed down to the dock to watch the sunset and Scott nabbed a catfish (bringing his total fish for the weekend to -1).


You two are amazing. Looks great. Love you both.
Island and curtains look really nice. Great job!! Thanks for continuing to keep us updated. Helps to make me feel involved in the projects. Love you both