
Completion of the Island
- Michelle Dittmer
- Jul 25, 2021
- 3 min read
IT'S DONE!!!
It'sdoneit'sdoneit'sdone!!!
Officially, 100%, actually, completely DONE! Holy crap I never thought this day would come!
It seems every project we've started has little "loose ends" to to tie up, but now, the island is FINISHED!
Last week we ended by cutting trim for the ends of the island.
We had to create a jig (this is approximately jig #472) to hold the trim at the angle we needed to cut since it wasn't a straight line due to the slant in the floor.

We also cut the trim for the ends and half of the little "feet" that curve around the island, but left off after I started painting.

This week we sanded and repainted the trim we cut last week and finished creating the "feet" by cutting the small pieces that wrap around to the island.


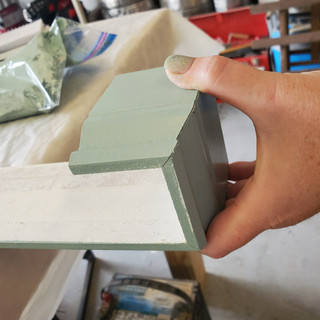
See how the ends are little squares? They'll wrap around from the sides to the front of the island creating the "feet" by ending against the toekick.
Now, about that toekick. We decided to use a piece of birch plywood cut to the length of the island and painted to match the cabinets to cover the seams between the cabinet boxes.
Scott used the circular saw and the Kreg track to cut strips from the plywood to the height of the toekick, then he used the miter saw to cut them to the appropriate length.

Once the toekicks were cut to size we sanded and painted them.

Here's what the bottom of the island looked like before:

See the three boxes? We could have just painted this but a) that would've been hard to get to with the cabinets already installed and b) you'd still see the separation of the cabinet boxes.
Here's after the toekick was installed:

Smooth and clean!
Now if guests lay on the floor and stare at the toekick there are no pesky seams 😉
Next we installed the end pieces of trim and the "feet". We reinforced the feet by adding a block behind them in case they get kicked or banged into, and now they won't collapse.


With all the trim installed I filled holes and caulked any seams.

Once the caulk and filler I used in the nailholes dried, I sanded everything down and touched up the paint. Here's the finished product:

(Oh, and Clover doing her best Vanna White)
Never in a million years did I think our island would ever be done (joking, of course, but I truly didn't know *when*), or that it would look THIS good!!
Here are some of my favorite features of the island (besides the feet, which I just can't get over!):
We have a total of 12 drawers and two cabinets on the island, and one whole drawer is nothing but spices:

Our plates and bowls have their own drawer and it's right by the dishwasher, making unloading the dishwasher so easy:

My silverware drawer (right above the plates and bowls) is HUGE and also holds all of my serving utensils:

We have a drawer for my "unitaskers" (random kitchen utensils that have basically one use, credit to Alton Brown for the name):

And yes, it does stay mostly that organized thanks to the soft-close drawer slides!
Our kitchenaid mixer and instant pot have their own cabinet (no longer taking up counter space or hiding on top of the fridge):

We have a "blender" drawer (well, it actually holds a Ninja blender and attachments, a small crockpot, a food processor, and two charcuterie boards):

We have several drawers dedicated to small appliances, but this is the nicest looking one 😉.
Finally, you already know how much I love our trash cabinet with little drawer for trash bags:

In addition to finished the island (still doing a little happy-dance as I type this), we got the last two doors hung!
This wasn't a huge project, considering we only have 5 interior doors (not including bifold doors on closets), but this has plagued us for a while.
The final two doors were on the guest bath and the laundry room. We started with the bathroom door.


We haven't touched either of the bathrooms so don't mind the state of this one!
Next up was the laundry room door:

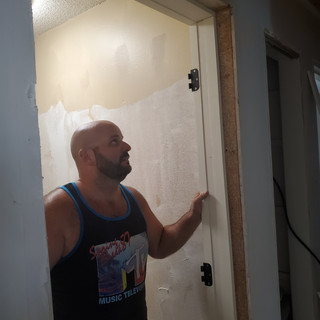


Sometimes Scott is less than thrilled that I'm constantly taking pictures.
Check out the wall behind him, I started skim coating it and only got as high as I could reach without a step stool 🤣
Here's the hall with all the new doors in place:

It looks so clean and nice! We still need to add door trim and build the door for the closet (it was a bifold door, but it's smaller than normal, so not sure what we'll replace it with). I also still adore the cedar ceiling, it added so much character to this little hallway.
The final task for this (100+ degree) weekend was buying the wood for the trim around the outsides of the doors, so that's the goal for this week.


Comments