
Trim Part 3 & The Island
- Michelle Dittmer
- Mar 15, 2021
- 5 min read
I missed a week of posting (forgive me?), but had a good reason. Or a couple reasons, really.
Last week (and the week prior) Scott was battling Covid. Pause... it wasn't nearly as bad as it seems. He's young and healthy, so what it looked like for him was days of feeling tired, body aches, a headache, and the loss of taste and smell (still not fully back yet). It also meant he quarantined in the guestroom, wore a mask when in the "common areas" of the house, and we ate together outside. By some miracle, I didn't get it.
Special thanks to Momma and Padre who brought us groceries and home-cooked meals while we both stayed in!
We didn't want to worry anyone, so we kept it pretty quiet, but all is well (minus Scott's sense of taste and smell), and we are mostly back to operating like normal (still just a bit tired too).
I have a second reason for not updating, progress has been sloooooowwww. The trim doesn't take long to cut or tack up, but there's caulking and filling holes, waiting, sanding, more filling, waiting, more sanding, painting, and waiting. It's pretty boring stuff, actually.
On the positive side, our house is starting to look like a home! I know, I know, I keep saying that, but it's like every little project checked off (or even started, for that matter), is one step closer to the finished product!
It's funny how something like a 5" board around the room can really pull it all together!
Last week and this week we focused on the trim in the front room/living room. Even though we spent a ton of time leveling the floors, they aren't perfect, so when we put up the trim some areas had a noticeable gap at the bottom that appeared as a shadow:

Normally, people (contractors? Homeowners? I don't know who makes this call) would add a piece of quarter round to fill this gap. I'm not anti-quarter round, but I really love how clean just the baseboard looked, so I tried a pinterest trick that involved caulking the gap.
First I taped the floor as close to the baseboard as I could, then I over-filled the gap with caulk and used a caulk scraper to make the caulk level with the baseboard. When I peeled off the tape the gap was filled!

It's a little time consuming, uses a ton of tape, but makes me happy, so it's what we'll do everywhere 😉
In case you're STILL doubting the magic of caulk, here's proof it fixes EVERYTHING:


This particular corner still needs paint to finish it off, but it looks soooo much better!
All of the trim is officially up in the front room and living room, the holes have been filled, and it's been caulked underneath and at the line with the wall at the top. I still need to add a coat of paint, but did manage to completely finish the trim behind the couch so we could put the living room back together. Check out these before and after pics, featuring Toby:


We also got trim up on the master bedroom door (which is in the living room). I adore the new door, doorknob, and the trim. It makes me happy just looking at it 😍


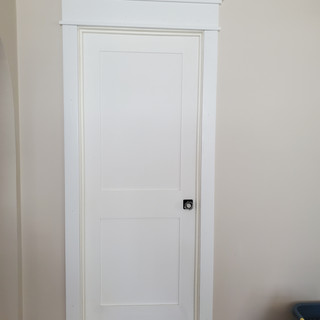
You can see in the photo the door from inside our room is super close to the wall next to it. We ripped the 1x4 down to about 2.5" to fit and had to trim the header to fit.
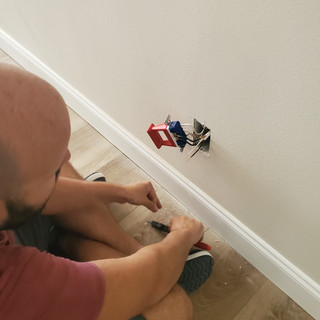
Last week Scott also mounted our living room TV, a project we've had on the back burner really since we moved in.
He added an outlet behind the TV mount so we wouldn't have any cords showing and it's PERFECT! Our living room is pretty narrow and the couch and ottoman are both really large, so mounting the TV makes it feel so much bigger.


I swear it's level, I just don't know how to take a level picture 😅
The most exciting thing that has happened in the last two weeks is that we started building our island! Our kitchen (like everything else) is on the list to be remodeled. For months now I've envisioned a large island running the length of the kitchen. I looked into the cost of cabinets, saw the price of one cabinet and got sticker shock. Luckily, Scott is uber handy (in case you hadn't caught on to that yet), and is ready to take on building me the island of my dreams.
It started by measuring like 47 times, taping out on the floor where we wanted the island to go, and calculating all of the measurements for individual cabinets and creating a preliminary cut list (diagram) to get the most out of the wood we bought (birch plywood, it's sooo pretttyyyy)


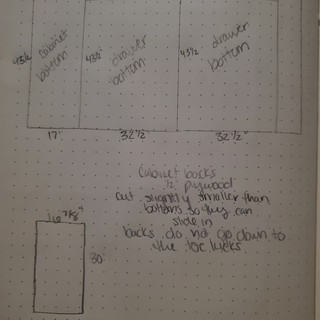


It's difficult to tell from the drawings because they're only one side at a time, but there will be six cabinets, three on each side, totalling 84.5 inches long (probably 85 to account for inevitable errors) with a 12 inch overhand on one side for stools (total of 97"), 47 inches wide. There will be a cabinet with pull-out trash on the side closest to the sink, a cabinet on the other side that will hold my instant pot and kitchenaid, and 4 (two on each side) cabinets with 2 or 3 drawers to hold all of my large kitchen stuff.
If that sounds big, it's because it is. It will actually extend just beyond the kitchen and into the dining room just a bit. It will have a butcher block countertop, and be the perfect prep zone for all the cooking!
Scott has high hopes of actually building ALL of our cabinets, but we are going to see how the island goes.
We've already made our fair share of mistakes (don't zoom in on the plans we drew or you'll see how many times I erased numbers), but nothing that couldn't be fixed.
We've learned new a new technique (using a Dado stack-which is multiple blades together on the table saw- to create a groove that the bottom and back slide into so there are no nail holes to fill), and we survived making the first box!


The box we created is actually two cabinets, one side will be the pull out trash, one will be the cabinet for instant pot/kitchenaid.
We wanted to create them this way so there's no seam on the side, but I do think it was a bit harder than making each cabinet individually.
I totally screwed us up by not realizing you can't get drawer slides in every 1" increment; in my mind we'd make the island the largest it could be, cut the cabinet in half with a divider and add drawers. Nope, once we ordered slides we realized we only had 21 inches of usable depth, so we re-measured, re-cut, but ultimately it worked out and will only be a couple inches smaller than we thought.
The moment of truth came when Scott slid the cabinet back into the box, using the dados he cut on each side panel as the guide.
Obviously this is the "easy part", we still have to build drawers and the face frame, but this first box helped us understand the process and get the measurements down pat. Drawer slides will be here mid-next week, so fingers crossed we have more to share next weekend!
I don't think I've said I enough, but if you read this blog (weekly, occasionally, or today is your first time), THANK YOU! I really enjoy sharing our projects, it helps remind me that we're working towards our goal of a finished, perfect-for-us house, and I hope helps keep all of our dear friends and family in the loop with all of the goings-on at Casa Del Dittchelle ❤


Comments