
The Second Guest Room
- Michelle Dittmer
- May 9, 2021
- 2 min read
After the mad dash to (mostly) finish the island last week, we took it easy this week, catching up on our netflix/Hulu shows throughout the week and doing a million loads of laundry, leaving the work for the weekend.
This weekend we started work on the second guest room, affectionately known as the "boys' room". Who are the "boys", you ask? Scott and Toby. Do they sleep there? Nope, but the other guest room houses all of my craft supplies, so I've deemed it the "girls' room" (Clover and I are the "girls"), so Scott and Toby get the other room. This is the last of the bedrooms and we haven't touched it since we moved in.
This room has been storage for the kitchen stuff that we put in the island, my books, all our decorations, and a few other odds and ends.
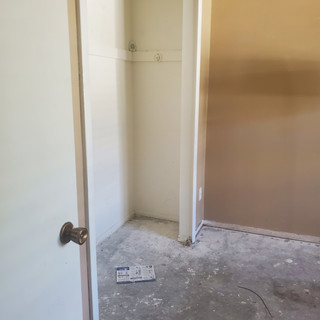
To start work we had to clear at the room. This is how it started:


Note the popcorn ceiling, the boxes, some of which have been opened and rummaged through, and the elliptical. Surprisingly, it didn't take much time To clear the room. A lot Of the boxes were empty, or mostly empty, and the way things were haphazardly strewn about made it look like more stuff than it was.
As we moved out boxes we also went through items, creating a sizeable pile for donations and reorganizing the remaining items a bit.
Scott took down the ceiling fan and removed the remaining trim (most of it we pulled up with the carpet the week we got the keys (almost 7 months ago 😱😱).
With the room cleared we got to work on the popcorn ceiling. We are pros at this now (of course we are, now that we only have the laundry room left to do!). Scott used the paint sprayer to liberally soak the ceiling, filling the room with mist.


We let it sit and soak a couple minutes then scraped it off. More water is better if you ever take on this project.


This part went extremely fast compared to the rooms we did previously. I'm crediting the extra water and the knowledge that we will do crown (so we didn't stress about the corners where the walls and ceiling meet) to hide some imperfections.


With the ceiling down, I started skim coating the walls. This is 100% not necessary if your walls are smooth, or even intentionally textured. Ours, however, we're uneven, with drips and bumps all over, so the skim coating will help give us a nice, even surface for the paint. My Padre says the key to nice looking paint is good prep.
Here's what the wall looked like pre-skim coating:

If you look closely, you can see the bumps I'm talking about. This picture actually doesn't look too bad, but up in the top left you can see some drips. This was just a random pic of the wall that had decent lighting, those drips are everywhere.
I skim coated what I could reach first then used the ladder abd got (most of) the high spots. Scott did the ceiling.


Comments