
The Hall & Our Tile Journey pt 1
- Michelle Dittmer
- Jan 24, 2021
- 4 min read
This week felt like a lot of little projects that made a big impact. Last week I started work on the hallway by skim coating and priming the walls. This week color went on in two forms: our main color (warm putty by valspar) on 3 walls and an accent color of Nocturnal Green by Valspar.


I love how dark Nocturnal Green is, it feels black, but when it's in the light you definitely see the green undertone.
Scott put up the inside trim in the doorway to the hallway where we had taken out the arch, closing up a big gap where we were missing drywall.


We need to sand the putty, fill the nail holes, and get another coat on and around the trim, but no more gaping walls!
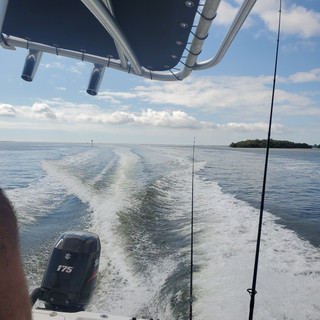
We woke up early Saturday morning to get the boat out and take advantage of the calm waters; we ended up also enjoying some eerie fog.
The fog was DENSE, but cleared by the time we made it out of the canals and river to the ocean. The photos turned out great though!


We fished for a while off of Sanibel, catching sheepshead, sea bass, grunt, and mangrove snapper. We saw a sea turtle, tons of dolphins, and a whole pod of manatees! The manatees were so active at the surface we actually thought they were dolphins at first. So cool to see!


After a few hours of fishing we headed back for more work.
My dad's favorite client, turned family friend, gave us a poweewasher, so we broke it out to finally clean up the dock.
Thank you, Frieda!! What a difference it made after less than hour!
Once the dock was done, we moved on to the next item on the list: the hallway ceiling.
A few weeks ago we tore down the hallway ceiling because of old water damage and we really wanted to add something unique to it, so we decided to use cedar planks. I wrote up a step-by-step you can read here if you'd like to see how we did it.
We love the way it turned out!


The wood adds a nice warmth to the ceiling, plus we didn't have to worry about taping and mudding the drywall seams, win-win!
Along with the ceiling, we squeezed in one other tiny project Saturday night: installing the threshold at our bedroom slider. This was the "finishing piece" that covered all the cut ends of the boards. We don't often go in and out through this door, but it's so nice to have this item checked off!


Sunday my parents, neice, nephew, and brother came to visit. Dad helped Scott add another light to the laundry room while mom and I laid out the entry tile.
Our laundry room is a weird "kinda-in-kinda-out" room. It was in the garage originally, but somewhere along the way, the corner it occupied it was enclosed, taking away from the garage, but allowing you to do laundry "inside". It doesn't have a vent for HVAC, so it's technically "outside", but since we put the exterior door in place leading to the garage, the room stays pretty consistent in temperature to the rest of the house.
It needs paint, flooring, and a serious deep cleaning, but it's far from the one-bulb room it was when we moved in. Literally, there used to be a lone bulb lighting this long room. The far end of the room was in near total darkness, even with the light on. Yikes!


If you remember, we already replaced the light in the laundry room once with a light I bought from Amazon for maybe $30 (second picture above, but note the darkness still behind it). It was LED, had a remote (why though??), and apparently flashed if the batteries were out/dead in the remote (ask me how I know, ha!). We found the new lights we put in for $24/ea at Costco, they're still LED, but much brighter and better quality. The only downside is you can now see much more clearly that someone "touched up" the laundry room with paint that didn't match.
The laundry room is currently storage for all of our closet doors, that's what you see hiding in the back. Another project for another day.
While Dad and Scott were wiring the new light, mom and I were dry-fitting the tile in the entry.
Full disclosure: I have never done tile before. I've watched a ton of YouTube and have had advice from Dad and Scott, and help from Mom (and Miah!).
All we were trying to do was lay out the tiles were we wanted them to see how much cutting we'll need to do (not as much as I thought).


We laid them in the pattern I wanted just on the floor first to see how/where to start, then measured and marked the middle of the entry, then used the laser level to make a line across the entry that we aligned the tiles on. It wasn't as easy as this sounds, mostly because, again, it was our first time working with tile.
Now that we know the general pattern, I think we'll be ready to cut and lay tiles next week, yay!
In the middle of all the work we were doing we spotted a manatee 3 doors down, so we walked (who am I kidding? I ran like they might disappear into thin air if I didn't lay my eyes on them) down to get a closer look. It was a mama and baby like last time, and according to the neighbor, they're here about every day in Feb/March 😱 amazing!

There wasn't really a major project we finished this week, it just feels like the little things are moving bigger projects in the right direction. I'm hoping next week will feature some finishes!


Comments