
Hodge Podge Weekend
- Michelle Dittmer
- Jul 18, 2021
- 5 min read
This week we had a goal of finishing the doors. We didn't quite get there, because frankly, putting doors in is zero fun. It's not really a two man project, other than me pushing the door when Scott says to, I mostly just stand and watch.
So, we shifted our attention to some of the "remainder" projects on the list, starting with building a small drawer for trash bags above the trash cans.
When we designed the island I really wanted a small "hidden" drawer over the trash can specifically for trash bags. I wanted the island to look similar on both sides (one cabinet and six drawers per side), so the idea was to put a little drawer right on top of the trash that you access when the trash cabinet is open.
If you remember back to when we built the island we had a tiny mix up when ordering drawer slides. As a reminder, drawer slides aren't purchased based on the depth of the drawer (typically a little smaller than the cabinet). So when we ordered the correct size we had forgotten about my little drawer; until last week.
Scott ordered another slide and made our drawer.
We measured inside the cabinet, knowing this would be an inset drawer (meaning it wouldn't stick out beyond the frame), and got to work.


Scott cut little spacers to hold the slide off the edges of the cabinet and screwed the slides to the back and sides. Note that Scott is IN the cabinet. This is what happens when you have to add slides after the cabinets have been built, it's a little harder than adding then while you build the cabinets.
With the slides in place we took more measurements for the drawer box length, width, and height and headed to the garage to build it.
Scott quickly cut the pieces he needed, including adding the dado for the bottom of the drawer to slide into. He's a pro at drawers after building the island!
I sanded everything down with 220 and then Scott used a can of bug spray to make rounded corners on the cut out for the pull. I cut along his lines with the scroll saw and sanded the edges smooth.

He then used pocket screws to put the whole thing together, gave it another quick sand, and sealed it with boiled linseed oil.


With the box together it was time for the installation. Unfortunately we had mounted our slides 1/2" too high (or made our box 1/2" too tall, depending how you look at it) so Scott moved the slides down 1/2".

Once he moved the slides down the new drawer box fit like a glove!

He re-installed the trash cabinet to finish off this project.


That little hand cut out makes me irrationally happy. It's just perfect and opening the trash makes me smile now (yes, I realize this absolutely makes me a weirdo, but I'm ok with that).
Sunday we had to take care of some less-than-fun admin-type items. Since we started this reno we have been saving all of the receipts for everything. Partly out of curiosity to see what we have put into the house, partly for if/when we refinance or sell, and partly just in case we need to return something.
We have a spreadsheet where we track items based on category: tools, building supplies (anything deemed a "material" essentially), fixtures (appliances, lights, etc), and labor (anything we hire out).
We were a teensy little bit behind in logging our receipts (this is sarcasm, we were super far behind), so we took a couple hours to catch up.

Even after they've been logged, we keep the receipts (you can't return something based on a line in an excel spreadsheet). Here's every receipt we've saved since starting this project last October.

I'm so glad we took the time to do this, all caught up!
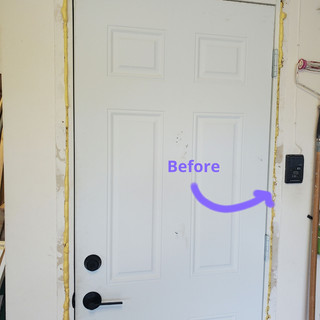
While we didn't hang every door (just three were left), we did get up one more. All three bedrooms now have the new doors on them.
Looking down the hall at these new doors and knobs makes my heart sing. I cannot wait until the trim is up and the hall is complete.

As a reminder, here was the old door:

Huge improvement, right? Only two doors left (bathroom and laundry room) and every interior door will be new!
The other "remainder" item on our list was trim around the bottom of the island. We had originally wanted to get the rubber toekick meant for under cabinets, but none of the colors would look quite right (grey, white, or black), so we've been knocking around ideas, trying to decide what to do.
The trim around the island and in the toekick area serves two purposes, 1) to cover the gap between the floor and the island and 2) to make the three cabinets look like one.
I found some inspiration on pinterest from Inspiration for Moms

The trim she installed around her island almost matched our baseboards. I thought this would add "heft" to the island, so I showed Scott.
It would take some finagling (as every project does), but Scott said it would be doable.
First step was tons of measuring. The length of the side of the cabinet and the height of each toe kick.
Then Scott had to cut down a piece of our baseboard to the right height, but it wasn't a straight cut. The floor, although "leveled" isn't actually level, we had to shim the island to get it actually level, making one side taller (from the floor) than the other. I know that sounds confusing, but stick with me.
Scott cut the baseboard to the appropriate length (actually 2" long so he could cut an inch off each side at an angle) then used another piece of wood as a "jig" to cut the line (this is because it's not actually straight so it can look level on the unlevel floor).


He then cut two small pieces of trim that will go against this long trim, and under the front of the cabinet like a little foot.

We used glue and finish nails to hold the three pieces together. When it's done there will be another piece to close the gap between the front piece and the toekick, completing the "foot". That piece won't go on until the trim for the toekick is up.


With the three pieces together, we filled the nail holes, sanded, and painted.


While the paint dried, Scott changed the battery and programmed the garage door keypad that we haven't used since we moved in.

He moved the garage door opener to the correct side of the door so we can open/close the garage without being in the garage:


Finally, he also built a couple brackets to hold trim while we are between projects:


We spent the rest of the evening on the couch watching movies and listening to the storm. My plants are loving all this rain!
I even finished my giant potholder. It's two strands of multicolored cotton crocheted with a stitch that makes it double-thick, so it'll be perfect for setting pans on the counter with its large size.

We still need to sand and paint the trim for the island one more time before install. We also need something for the toekick. Scott's truck is in the shop, due to be out next week, so for now we are limited on the large-item transportation, but stay tuned, I'm sure we'll figure it out soon!


Comments